
We feel proud of our cars and want them to look good for a long time - or at least until we can upgrade to the next model.
To preserve the exterior appearance of a car, we often turn to waxing, consistent washing, and applying polish on top of the car’s paint. Over time, these activities can actually have an adverse impact on the paint job.
Ceramic coatings have not been available to the general consumer for too long. Recently, however, the widespread availability and home applicator kits have made ceramic coatings a good alternative.
Even studies have shown that a ceramic coating can help to enhance the appearance of the materials underneath - which is your car’s paint job in this case. Apart from appearance, the coating offers extra protection against oxidation, corrosion, and other elements that affect the exterior of our cars.
If you are looking for how to apply ceramic coating to your car, then there are a few things to take into consideration.
You’ll discover a step-by-step set of instructions in this post. Follow these steps for a more efficient job when applying a ceramic coating car.
Jump to a Specific Section
Prepare A Car For Ceramic Coating? - [Step-by-Step]
How To Ceramic Coat A Car - 4 Simple Steps
Beware Of These Common Ceramic Coating Fails
When it comes to the application of a ceramic coating to a car, preparation is everything.
Failure to follow appropriate preparation steps could cause interference with the coating - which can affect the effectiveness of the protection offered by the ceramic solution.
Thus, once you have the ceramic coating ready, the initial step is to prep the car.
Below, you will find an overview of the steps you should take when preparing your car for the application of a ceramic coating:

The first thing you want to do is wash the exterior of your car. Grime, debris, dirt, and other compounds are constantly collecting on the surface of your car as you drive and go about your daily routine.
By washing the car, you can effectively remove these from the surface and leave behind a clean exterior.

The use of clay after washing can also be a good option throughout the preparation of your car.
Clay uses an abrasive formula that can assist in removing some of the deeper debris that has collected on your car over the years.
The claying process requires the right type of clay decontamination formula, as well as some lubricant and clean water. You can choose to use a clay bar. Some people rather prefer a towel or a clay mitt.

When applying a ceramic coating, you are not fixing imperfections on your car. You are rather protecting the current paint job and enhancing the shine of the vehicle.
With this in mind, correcting any imperfections prior to the ceramic layer can be very helpful.
Use a paint corrector on the exterior surface of your car. Make sure to check for any type of scratches or marks on the car, such as swirls. Use the paint corrector on these spots to ensure the car’s paint looks perfect before proceeding.

Once paint correction is done, the next step should be to apply a high-quality polish to the exterior of the car.
A polish will add more shine to the paint job of your car - and this will reflect once the ceramic coating is applied.
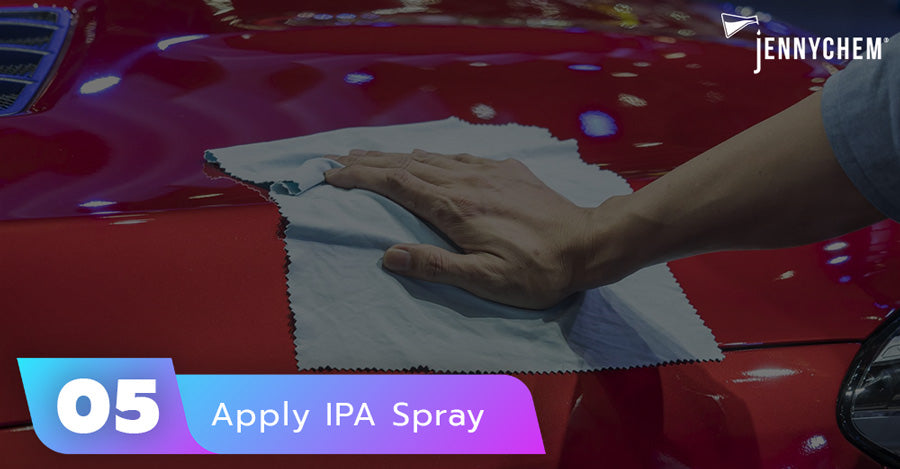
There is one more step left when preparing your car. Once you have followed all of the preparation steps, grab some IPA spray.
These are also called Isopropyl Alcohol sprays. Make sure it is thoroughly and effectively blended. You should wipe the exterior surface of your car with the spray.
The spray is an important part of the process. It helps to remove any leftover chemicals, lubricants, and small particles from the car - creating a clean surface for the ceramic coating to be applied.
You need a clean “canvas” on your car when you apply a nano-ceramic coating. This is why following each of the steps mentioned below is important.
Once you have completed all five steps, you are ready to move onto the next part of the process - applying the ceramic coating.
Applying a ceramic coating to your car can be simpler than you think.
While it may be convenient to send your car for a professional ceramic coating, these can be expensive.
By following a few simple steps, you can do the process at home and still achieve excellent results. In this section, we share a simple step-by-step process to help you understand how to ceramic coat a car.

Before you start the process, it is crucial that you have the right products at hand. The very first thing you need is the actual ceramic coating products.
This comes in a liquid formula and is usually packed in a small bottle. In most cases, a 30ml bottle should be sufficient to coat your entire car.
The ceramic coating formula is not the only product you need to ensure the layer can be applied effectively. In addition to this product, you should also equip yourself with the following:
Set of Gloves
A set of gloves can help to provide extra protection for your hands while you apply the coating. The formulas used for ceramic coatings are known to dry the skin out quickly. The right pair of gloves help you avoid this problem.
Sponges
An applicator sponge will be used to apply the coating onto the exterior surfaces of the car. Make sure the sponge is appropriate for this particular purpose and check that it has a completely flat surface.
Applicator Cloths
Applicator cloths are also essential. They are generally wrapped around the sponge you use to apply the ceramic coating. Make sure these cloths are made from suede fabric.
Buffing Towel
You also need a buffing towel to buff off materialized parts of the coating. A microfiber towel tends to work best for this purpose. The soft structure ensures you do not scratch your car while still effectively lifting debris left behind by the ceramic formula.

It is now time to apply the coating to your car. Make sure you choose the right environment.
Try to avoid applying the solution while your car is exposed to direct sunlight. Get the applicator sponge and one of the suede cloths. The cloth is wrapped around the sponge.
Once you are ready, thoroughly shake the container that has the ceramic coating formula.
Then apply up to 10 drops of the formula to the lower side of the sponge - the drops should be applied to the suede cloth that wraps around the sponge.
Try not to use too much of the solution at once, as a little really goes a long way when applying a ceramic coating.
Start moving the applicator sponge on the surface of your car. Use a consistent motion to avoid leaving streaks behind once the application is made.
Make sure you focus on applying the coating part-by-part. You could start with the fender. Once the entire fender is done, you move to one door. Complete the entire structure before moving on to the next.
As you continue to coat the car, make sure to check that the sponge remains moist.
As it starts to dry out, add a few more drops. This ensures you cover the entire exterior of your car evenly without wasting the solution.
Once a part is coated, let it sit for about five minutes, then get the buffing towel. The towel should be used to buff off residue that might be left by the ceramic coating.

After applying the ceramic coating to your entire car, the next part of the process is to allow for the solution to cure.
During this process, the solution dries and starts to harden. Wind, humidity, and the temperature of the environment all contribute to how long the curing process will take.
Most manufacturers will give you a window during which the vehicle should be allowed to cure. In many cases, you will need to wait for a period between 24 and 48 hours.
Make sure no other liquids come into contact with your car during this time. Most people find it effective to leave their car in the garage during the curing process.
This way, you have more control over the environment and can effectively prevent contamination from airborne particles while the coating is curing.

When the coating has cured, you still need to ensure you follow appropriate aftercare procedures to ensure the protection offered by the coating is retained.
Bi-weekly washing is an essential part of maintaining the ceramic coating on the car. It also helps to prevent too many contaminants from accumulating on the car. You want to ensure the car is not washed when exposed to direct sunlight.
Here are a few important tips to consider during aftercare:
Tip 1: Use two buckets instead of one when washing your car. One bucket should be filled with clean water.
The other bucket contains water with the appropriate shampoo for your car. You rinse the sponge off in the water bucket and then dip it in the soap bucket.
Tip 2: Do not use the same mitt and sponge for both the car’s main surface and the wheels. Also, try to get different soaps for each as well.
Tip 3: Make sure you start the washing process at the top region of your car. The bottom areas will usually have more dirt on them, as they are closer to the ground.
If you start at the bottom, you may find that some of the dirt is transferred to the upper parts of the car while washing.
Also Read: What is Ceramic Coating? Cost, Benefits, & Drawbacks
After applying the ceramic coat to your car, you’ll notice an immediate difference in appearance.
Shine is greatly enhanced - especially if you take all of the preparation steps into account.
Throughout the process, however, there are a few common mistakes that people tend to make. When you make a mistake throughout the process of prepping the car and applying the ceramic coat, then the results may not be as you expect.
Let’s take a look at a few common fails that you want to avoid during this process:
Failure to follow all of the preparation steps is generally one of the major fails.
When there is still debris or grime left on your car, the ceramic coating does not provide effective protection. Always make sure your car is spotless before applying the coating.
Some people expect the ceramic coating to fill gaps in paint and restore the appearance of paint-related problems on their car. Unfortunately, this is not the purpose of a ceramic coating.
Thus, always ensure you fix any scratches and marks on the paint job of your car before you decide to apply the ceramic solution.
Improper maintenance after the ceramic coating has been applied is another common issue. You need to ensure you wash the car bi-weekly and implement other steps that ensure the longevity of the ceramic coating can be extended as far as possible.
Another mistake that people often make is to apply additional products on top of the ceramic coating.
Once the coating is up, avoid using an abrasive product, such as a clay bar. You also do not need to apply wax or similar products to your car.
We have taken a look at important steps that you should take to coat your car with a ceramic layer at home.
There are still some questions that may be unanswered - which we aim to address below.
One misconception about ceramic coatings is that you need multiple bottles to cover your car.
In fact, a bottle of ceramic coating that contains around 60ml of the solution can be used on more than one car.
This is a great option if you have more than one car that requires a ceramic coating. Smaller containers are also available if you prefer a solution that will only cover your car.
While this is the general rule for the average car, take note that you should take a few factors into account. The size of your car plays a major role in how much ceramic coating you will need. Larger cars and trucks would, of course, need somewhat more of the solution.
While the wax is a good option for providing temporary shine and protection to a car, the substance can interfere with a ceramic coating.
Never apply a layer of wax before you start to use the ceramic coating formula. It is crucial to ensure the car is clean and that you are applying the ceramic coating directly to the layer of paint on the exterior.
If there is anything in the way, it could interfere with the coating's ability to bond to the paint on the exterior of your car. This would reduce the effectiveness of the coating while also causing a decline in its longevity.
In addition to wax, make sure no grime or dirt is present on the surface of the car before the ceramic coating is applied.
Once a ceramic coating has been applied to the exterior of your car, you will have effective protection for a long period of time.
Some people may want to apply additional coatings on top of the ceramic layer, such as wax. This is generally not advisable. Instead, focus on implementing proper maintenance for the ceramic coating, as this would be sufficient to ensure your car remains protected.
No, it is never a good idea to clay bar your car once a ceramic coating has been applied.
The clay bar process has been shown to cause the ceramic coating to break down. This is due to the abrasive compounds used in the clay. When the coating breaks down, it becomes less efficient at protecting your car.
There is no definite time in which a ceramic coating will last. Start by considering the type of coating that is applied to your car.
There are more permanent solutions that can last for an extended period of time.
DIY solutions generally last for about three years. At this point, a new layer of the coating needs to be applied. It is also advised to do maintenance on the coating every two to three months to help preserve the effects.
A ceramic coating can add extra protection to your car’s factory paint job.
Doing the process yourself can save a lot of money, but there are specific instructions to be followed.
Always start by prepping your car, as this step ensures the ceramic layer can effectively bond to the paint. Make sure to allow time for the coating to cure and understand how maintenance works to preserve the appearance and protection.
